本教程受Hetzner的VNC安装模块启发,研究改编(可用作阿里云安装纯净系统,以及任意版本操作系统)
需要默认系统Centos7(本人常用熟悉,其他系统应该大同小异)
1. 确定你的网卡名称,IP等相关信息。后面需要用到 网卡名称,IP,网关,子网掩码
2.下载 CentOS 的 bootstrap 文件 用于启动Centos可视化安装界面。一般各种版本Linux ISO镜像文件都有
- yum install wget
- cd /boot
- wget http://mirror.centos.org/centos/7/os/x86_64/isolinux/vmlinuz -O vmlinuz-7
- wget http://mirror.centos.org/centos/7/os/x86_64/isolinux/initrd.img -O initrd-7.img
复制代码
3. 添加自定义VNC安装grub启动条目
从/boot/grub2/grub.cfg 复制出当前grub引导项的内容
例如:(切记不要拷贝我的,每个机器都有UID,直接复制无法引导启动后果自负)
- menuentry 'CentOS Linux (3.10.0-327.22.2.el7.x86_64) 7 (Core)' --class centos --class gnu-linux --class gnu --class os --unrestricted $menuentry_id_option 'gnulinux-3.10.0-327.el7.x86_64-advanced-5abaf349-18ce-4481-8e31-f29b0120827f' {
- load_video
- set gfxpayload=keep
- insmod gzio
- insmod part_msdos
- insmod xfs
- set root='hd0,msdos1'
- if [ x$feature_platform_search_hint = xy ]; then
- search --no-floppy --fs-uuid --set=root --hint-bios=hd0,msdos1 --hint-efi=hd0,msdos1 --hint-baremetal=ahci0,msdos1 --hint='hd0,msdos1' 3ee40dd3-d836-4aa5-b145-9fbc2541b151
- else
- search --no-floppy --fs-uuid --set=root 3ee40dd3-d836-4aa5-b145-9fbc2541b151
- fi
- linux16 /vmlinuz-3.10.0-327.22.2.el7.x86_64 root=/dev/mapper/centos-root ro crashkernel=auto rd.lvm.lv=centos/root rd.lvm.lv=centos/swap rhgb quiet.UTF-8
- initrd16 /initramfs-3.10.0-327.22.2.el7.x86_64.img
- }
复制代码
然后把这一段粘贴到到/etc/grub.d/40_custom中做以下修改:
- menuentry [color=Red]'VNCInstall'[/color] {
- load_video
- set gfxpayload=keep
- insmod gzio
- insmod part_msdos
- insmod xfs
- set root='hd0,msdos1'
- if [ x$feature_platform_search_hint = xy ]; then
- search --no-floppy --fs-uuid --set=root --hint-bios=hd0,msdos1 --hint-efi=hd0,msdos1 --hint-baremetal=ahci0,msdos1 --hint='hd0,msdos1' 3ee40dd3-d836-4aa5-b145-9fbc2541b151
- else
- search --no-floppy --fs-uuid --set=root 3ee40dd3-d836-4aa5-b145-9fbc2541b151
- fi
- [color=Red]linux16 /boot/vmlinuz-7 inst.vnc inst.vncpassword=VNC密码(最少8位), inst.headless ip=主IP::网关:子网掩码::网卡名称:none nameserver=114.114.114.114 inst.repo=http://mirror.centos.org/centos/7/os/x86_64/ inst.lang=en_US inst.keymap=us
- initrd16 /boot/initrd-7.img[/color]
- }
复制代码
inst.repo 这个是网络安装盘,没试过windows盘,爱折腾的可以试试,相当于解压ISO列出文件即可安装
#注意之前下载文件的路径需要修改,下载在那里修改对应位置
打开 /etc/default/grub
修改 GRUB_DEFAULT=0 为 GRUB_DEFAULT=saved
(有些默认就是saved,别强迫症一定要改)
4. 重建配置,使配置生效
grub2-mkconfig -o /boot/grub2/grub.cfg
##查看所有启动项
awk -F\' '$1=="menuentry " {print $2}' /etc/grub2.cfg
# 下一次启动使用VNCInstall,仅使用一次
grub2-reboot VNCInstall
reboot
上述信息没问题,等待1-10分钟左右,根据机器网络而定
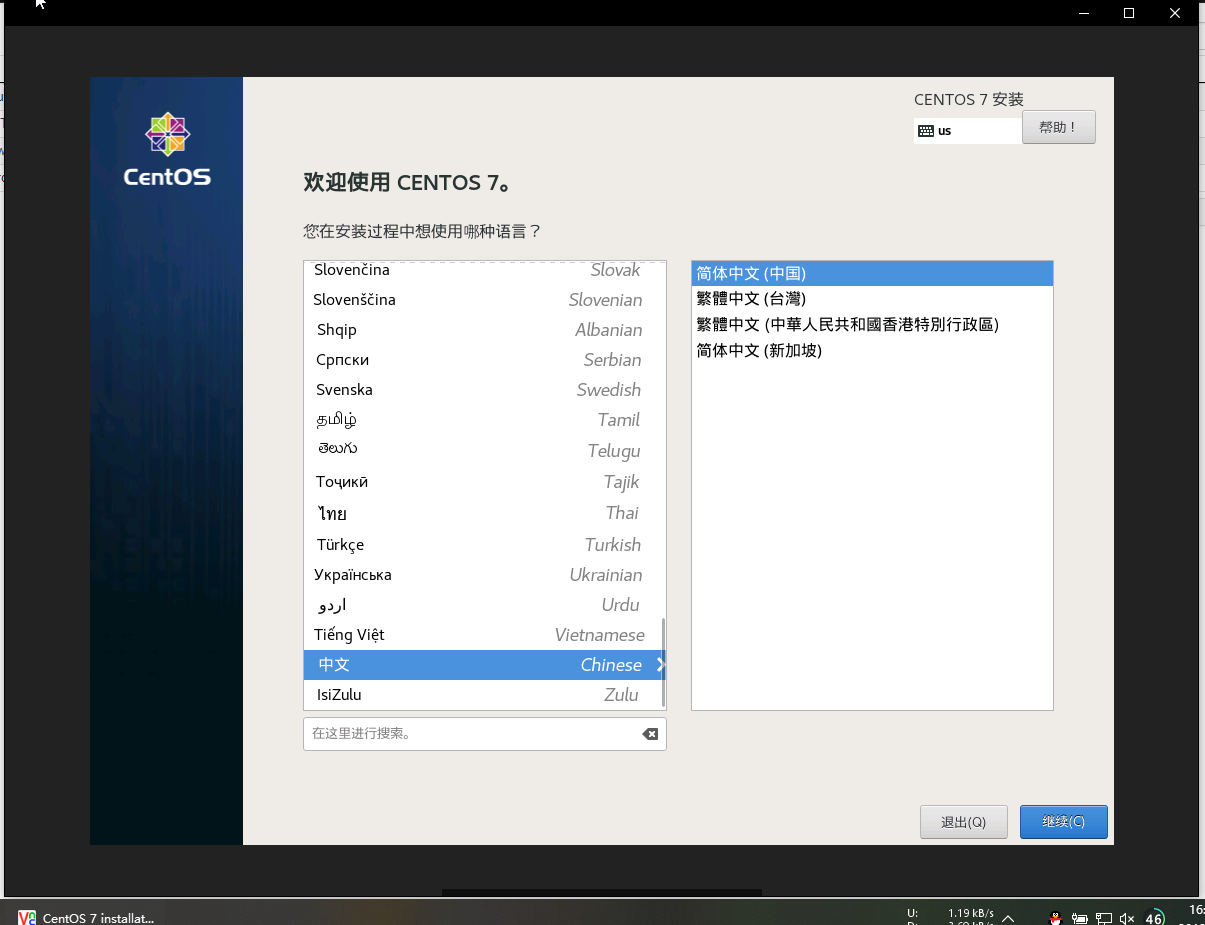
然后打开VNC 输入IP:1 连接成功则说明引导成功,可以开始可视化安装了
附一张成功图